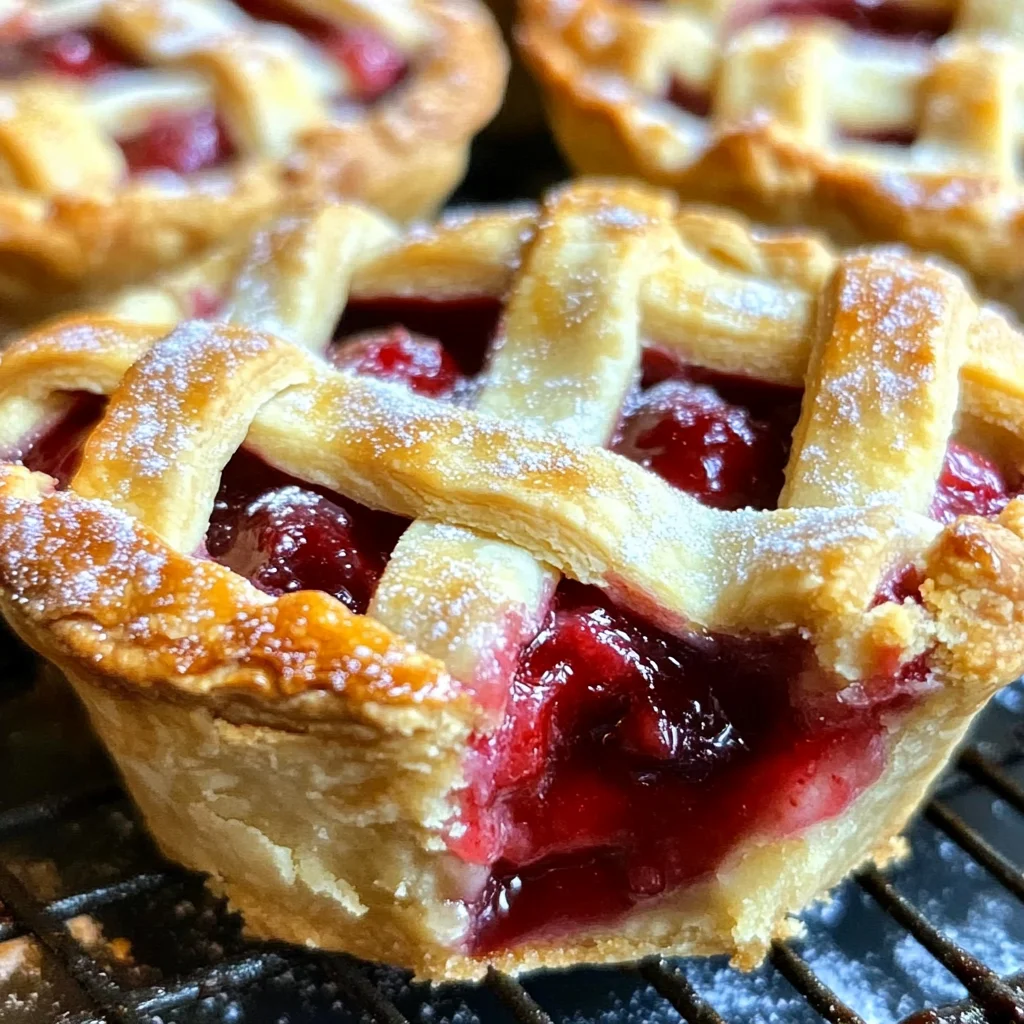
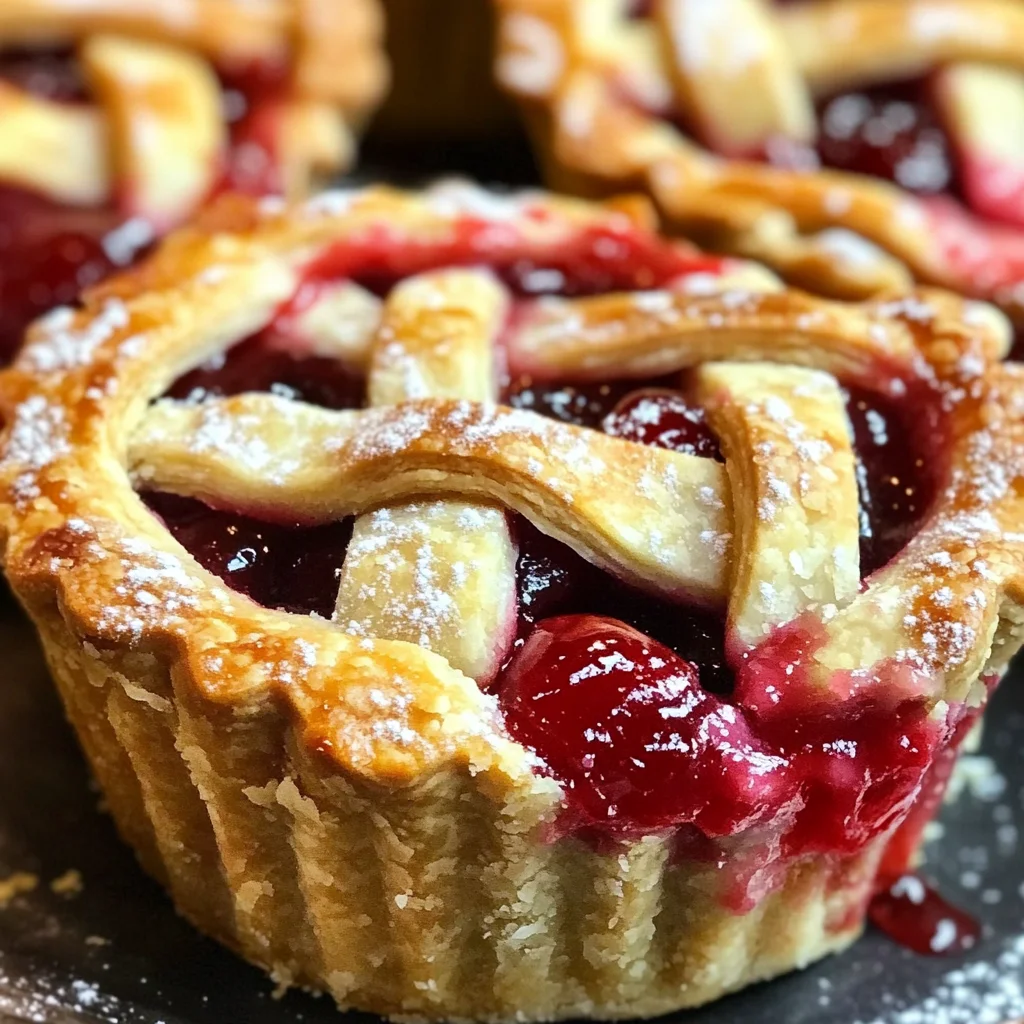
Mini Cherry Pies
Mini Cherry Pies are a delightful treat that brings a burst of flavor in every bite. This recipe is perfect for any occasion, whether you’re hosting a summer barbecue or looking for a sweet snack at home. These mini-sized pies are not only adorable but also quick to make, allowing you to enjoy your dessert in just an hour. With their charming presentation and delicious cherry filling, Mini Cherry Pies are sure to impress your family and friends!
Why You’ll Love This Recipe
- Quick and Easy: With just four ingredients, you can whip up these mini pies in no time.
- Perfect for Any Occasion: Whether it’s a picnic or a family gathering, these pies fit right in.
- Customizable: Feel free to experiment with different fruit fillings if cherries aren’t your favorite.
- Portion Control: Mini sizes mean everyone can have their own pie without overindulging.
- Fun to Make: Get the kids involved in cutting the crusts and assembling their own mini desserts!
Tools and Preparation
To make your Mini Cherry Pies, you’ll need some essential tools to ensure everything goes smoothly. Having the right equipment makes the process enjoyable and efficient.
Essential Tools and Equipment
- Muffin tin
- Rolling pin
- Cookie cutter or rim of a glass/bowl
- Knife or pizza cutter
- Mixing bowl
Importance of Each Tool
- Muffin tin: This is crucial for shaping your mini pies perfectly. It provides the ideal size and holds the filling well.
- Rolling pin: Helps roll out the pie crust evenly, ensuring uniform thickness for consistent baking.
- Cookie cutter or rim: Essential for cutting out the dough circles that will form the base of each pie.

Ingredients
For the Crust
- 1 package (2 9”) store-bought pie crust
For the Filling
- 2 cups cherry pie filling
For Topping
- 1 egg white-slightly beaten
- Sugar for sprinkling
How to Make Mini Cherry Pies
Step 1: Preheat the Oven
Preheat your oven to 350°F (175°C). Grease a muffin tin with cooking spray or butter, as you will need 10-11 cups for this recipe.
Step 2: Prepare the Pie Crust
Unroll one pie crust onto a flat surface. Using a cookie cutter or the rim of a glass or bowl, cut out circles that are about 3 ½ – 4 inches in diameter.
Step 3: Form the Pie Shells
Place each circle into one cavity of the greased muffin tin. Gently press down into the bottom and up the sides to form a small shell.
Step 4: Add Cherry Filling
Fill each shell with cherry pie filling until it is about two-thirds full.
Step 5: Create Lattice Crust (Optional)
For an attractive lattice top, use a knife or pizza cutter to cut thin strips of dough (about 1/4-1/3 inch wide). Weave these strips over the filled pies to create a lattice design. Press down slightly around the edges and trim any excess dough.
Step 6: Brush and Sprinkle
Brush the tops of each pie with the whisked egg white. Then, sprinkle sugar over them for added sweetness and crunch.
Step 7: Bake Your Pies
Bake in your preheated oven for 25-30 minutes, or until the crust turns lightly golden and you see bubbles forming in the filling.
Step 8: Cool Down Time
Allow them to cool in the pan for at least 15-20 minutes before handling.
Step 9: Remove from Tin
Carefully loosen the edges of each mini pie with a knife and gently lift them out of the muffin tin.
Enjoy your delightful Mini Cherry Pies! They make for an excellent dessert that’s easy to share with friends and family.
How to Serve Mini Cherry Pies
Mini Cherry Pies are delightful treats that can be served in various ways to enhance their appeal. Whether you’re hosting a party or enjoying them as a personal dessert, these serving suggestions will elevate your pie experience.
Casual Gatherings
- With Vanilla Ice Cream: A scoop of creamy vanilla ice cream complements the tart cherry filling perfectly.
- Fresh Whipped Cream: Light and airy whipped cream adds a luxurious touch to each pie.
Family Celebrations
- Fruit Salad: Serve alongside a refreshing fruit salad for a balanced dessert option.
- Chocolate Sauce Drizzle: A drizzle of chocolate sauce can add an indulgent twist that chocolate lovers will enjoy.
Outdoor Picnics
- Lemonade or Iced Tea: Pairing with a refreshing glass of lemonade or iced tea makes for a perfect summer outing.
- Cheese Platter: A small cheese platter with mild cheeses can provide a nice contrast to the sweetness of the pies.
How to Perfect Mini Cherry Pies
Creating the perfect Mini Cherry Pies is all about attention to detail. Follow these tips for an excellent outcome every time.
- Use Cold Ingredients: Keep your pie crust ingredients cold to achieve a flaky texture.
- Don’t Overfill: Filling the pies too much may cause them to overflow during baking; aim for about 2/3 full.
- Chill Before Baking: Chill the assembled pies in the fridge before baking to help maintain their shape.
- Experiment with Toppings: Consider adding different toppings like nuts or coconut flakes for added texture and flavor.
Best Side Dishes for Mini Cherry Pies
Complementing your Mini Cherry Pies with side dishes can create a more satisfying meal. Here are some tasty options to consider.
- Vanilla Yogurt: A tangy yogurt provides a nice contrast and adds creaminess.
- Mixed Green Salad: A simple salad with light dressing helps balance the sweetness of the pies.
- Grilled Peaches: Sweet grilled peaches can add another layer of fruity flavor that pairs well.
- Cheesecake Bites: Mini cheesecake bites offer a rich alternative that guests might enjoy.
- Pecan Tartlets: These nutty treats create variety on your dessert table and are always a hit.
- Berry Compote: A warm berry compote can enhance the cherry flavor while adding freshness.
Common Mistakes to Avoid
Making Mini Cherry Pies can be fun, but small errors can lead to disappointing results. Here are some common mistakes to watch out for.
- Using warm pie crust – Always ensure your pie crust is cold when handling it. A warm crust can lead to a soggy bottom.
- Overfilling the pies – Filling them too much can cause spills in the oven. Aim for about 2/3 full to allow the filling to bubble without overflowing.
- Neglecting egg wash – Skipping the egg wash can result in pale and unimpressive crusts. Brush each pie with egg white for a beautiful golden finish.
- Not letting them cool – Cutting into the pies immediately after baking can make them fall apart. Allow them to cool for at least 15-20 minutes before serving.
- Forgetting to grease the muffin tin – This simple step prevents sticking and makes it easier to remove the mini pies. Grease each muffin cup well before adding the dough.
Storage & Reheating Instructions
Refrigerator Storage
- Store leftover Mini Cherry Pies in an airtight container.
- They will last up to 3 days in the refrigerator.
Freezing Mini Cherry Pies
- Wrap individual pies tightly in plastic wrap and then place them in a freezer-safe bag.
- They can be frozen for up to 2 months.
Reheating Mini Cherry Pies
- Oven – Preheat the oven to 350°F (175°C), place pies on a baking sheet, and heat for about 10-15 minutes until warmed through.
- Microwave – Heat on medium power for about 30 seconds per pie, checking frequently to avoid overheating.
- Stovetop – Place pies in a skillet over low heat, cover, and warm for about 5-7 minutes until heated through.
Frequently Asked Questions
Here are answers to some common questions about Mini Cherry Pies.
How do I make Mini Cherry Pies from scratch?
You can make your own crust using flour, butter, and water instead of store-bought. Roll out your dough, cut circles, and follow the same filling instructions.
Can I use frozen cherries for my Mini Cherry Pies?
Yes! Frozen cherries work great; just let them thaw and drain excess juice before using them as filling.
How do I customize my Mini Cherry Pies?
Feel free to add spices like cinnamon or nutmeg for extra flavor, or mix different fruits with cherries for a unique twist.
What’s the best way to serve Mini Cherry Pies?
Serve them warm with a scoop of vanilla ice cream or whipped cream on top for a delightful dessert experience!
Final Thoughts
Mini Cherry Pies are a delightful treat that combines ease with deliciousness. They are perfect for summer gatherings or cozy evenings at home. Feel free to customize your pies with different fruits or toppings based on your preferences!
Mini Cherry Pies

Mini Cherry Pies are a charming and delicious dessert that brings a burst of fruity flavor in every bite. These adorable, bite-sized treats are perfect for any occasion—whether you’re hosting a summer picnic or enjoying a sweet snack at home. With just four simple ingredients and minimal prep time, you can whip up these delightful pies in under an hour. The combination of flaky crust and sweet cherry filling makes them a favorite among family and friends. Plus, their individual servings make them great for sharing!
- Prep Time: 15 minutes
- Cook Time: 30 minutes
- Total Time: 45 minutes
- Yield: Approximately 10 mini pies 1x
- Category: Dessert
- Method: Baking
- Cuisine: American
Ingredients
- 1 package (2 9”) store-bought pie crust
- 2 cups cherry pie filling
- 1 egg white (slightly beaten)
- Sugar for sprinkling
Instructions
- Preheat your oven to 350°F (175°C) and grease a muffin tin.
- Unroll one pie crust and cut out circles about 3 ½ – 4 inches in diameter using a cookie cutter or the rim of a glass.
- Place each dough circle into the muffin tin, pressing down gently to form small shells.
- Fill each shell with cherry pie filling until about two-thirds full.
- Optionally, create a lattice top using thin strips of dough.
- Brush the tops with egg white and sprinkle with sugar.
- Bake for 25-30 minutes until golden brown and bubbly.
- Allow to cool for 15-20 minutes before removing from the tin.
Nutrition
- Serving Size: 1 mini pie (45g)
- Calories: 150
- Sugar: 10g
- Sodium: 90mg
- Fat: 7g
- Saturated Fat: 2g
- Unsaturated Fat: 4g
- Trans Fat: 0g
- Carbohydrates: 19g
- Fiber: 1g
- Protein: 1g
- Cholesterol: 0mg