Mini Fruit Tarts With Pastry Cream
These Mini Fruit Tarts With Pastry Cream are a delightful treat perfect for any occasion. Their buttery tart shells, creamy filling, and vibrant fruit toppings make them visually appealing and delicious. These tarts are not only simple to prepare but also allow for customization with your favorite fruits, making them ideal for everything from parties to casual gatherings. Indulge in these delectable mini desserts that bring a burst of flavor with every bite!
Why You’ll Love This Recipe
- Easy to Make: The simple ingredients and straightforward steps mean even novice bakers can create these stunning tarts.
- Fresh Ingredients: Using fresh fruits adds natural sweetness and color, elevating the dessert’s appeal.
- Versatile: You can swap out fruits based on seasonality or personal preference, allowing you to make this recipe your own.
- Impressive Presentation: Perfect for gatherings, these mini tarts look elegant and will impress your guests without requiring professional skills.
- Homemade Goodness: The pastry cream is made from scratch, ensuring rich flavors that store-bought options can’t match.
Tools and Preparation
Before diving into making these mini fruit tarts, gather your tools. Having everything ready will make the process smoother.
Essential Tools and Equipment
- Food processor
- Rolling pin
- Mini tart pans
- Mixing bowls
- Whisk
Importance of Each Tool
- Food processor: Speeds up the mixing process for the tart dough, ensuring an even texture.
- Rolling pin: Helps in rolling out the dough uniformly for consistent thickness across all tart shells.
- Mini tart pans: Provide the perfect shape and size for individual servings, enhancing presentation.

Ingredients
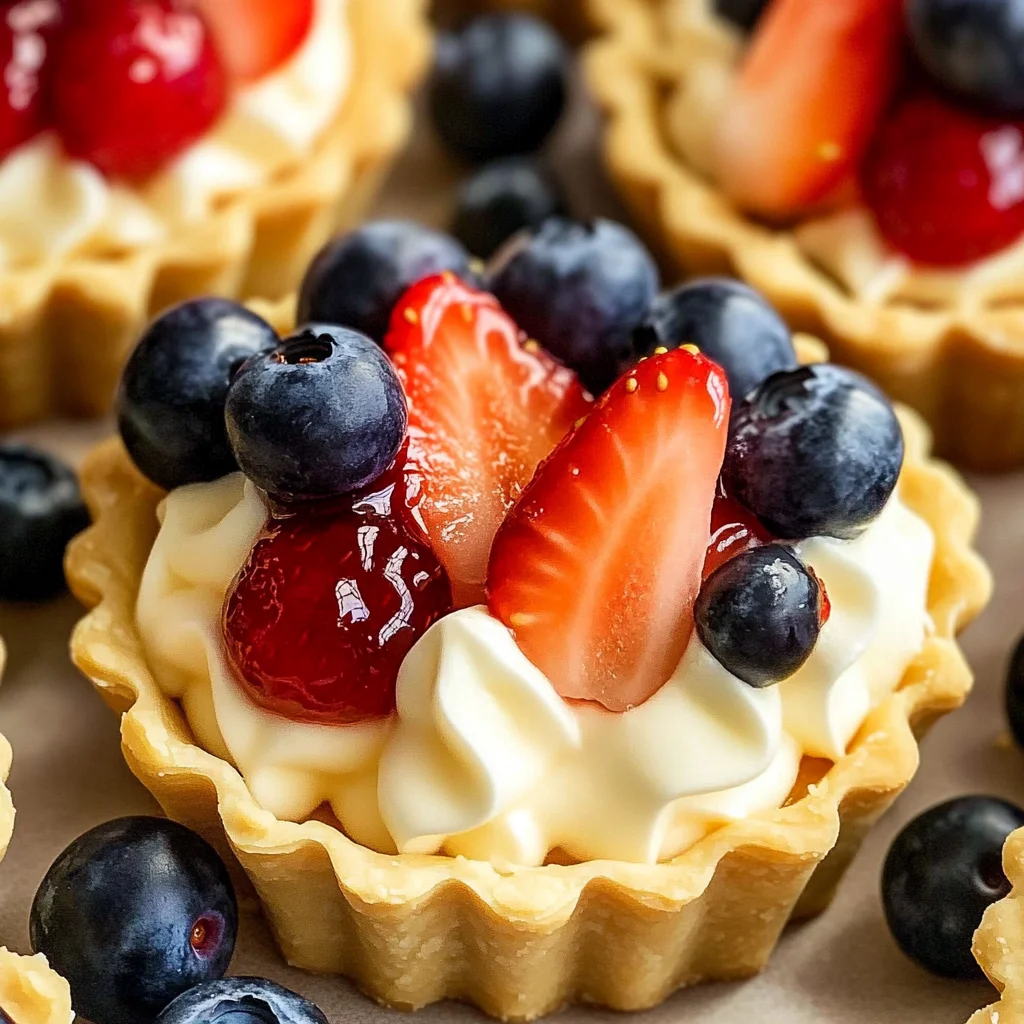
These mini fruit tarts are made with easy and buttery tart shells, filled with homemade pastry cream, and topped with fresh fruit.
For the Tart Shells:
- 1/2 cup Butter (unsalted, cold)
- 1 Egg
- 1/2 tsp Vanilla extract
- 1/2 cup Powder sugar
- 1/4 tsp Kosher salt
- 2 cups Flour
For the Pastry Cream:
- 1 3/4 cups Milk
- 2 tsp Vanilla extract
- 5 Egg yolks
- 1/4 tsp Kosher salt
- 1/2 cup Granulated sugar
- 3 tbsp Cornstarch
For Topping:
- Strawberries
- Blueberries
- 1 tbsp Apricot jam
- 1/2 tsp Water
How to Make Mini Fruit Tarts With Pastry Cream
Step 1: Make the Tart Dough
Start by making the tart dough. In a food processor, add the flour, powdered sugar, and salt, and mix until combined.
Step 2: Incorporate Butter
Add the cold cubed butter to the mixture. Blend until you achieve pea-sized pieces of butter. If you don’t have a food processor, mix by hand using cold hands to ensure the butter stays firm.
Step 3: Add Egg and Vanilla
Then, add the egg along with vanilla extract. Mix until a dough starts to form. Be careful not to overmix as this can toughen the dough.
Step 4: Chill the Dough
Cover your dough with plastic wrap and let it chill in the fridge for at least an hour.
Step 5: Roll Out Dough
Transfer the chilled dough onto a clean floured surface. Roll it out into a rectangle using a rolling pin.
Step 6: Cut Dough Rounds
Use a cookie cutter or a round bowl (one inch larger than your mini tart pans) to cut small rounds of pastry.
Step 7: Press Dough into Pans
Place each round into mini tart pans, pressing it down gently with clean hands. Cut off any extra edges.
Step 8: Prepare for Baking
Make holes in the bottom of each pastry with a fork. Place them in the freezer for at least 20 minutes to prevent puffing during baking.
Step 9: Bake Tart Shells
Preheat your oven to 180°C (350°F) and bake the tart shells for about 15-20 minutes or until they turn light golden brown. Remove from oven and let them cool while preparing the filling.
How to Serve Mini Fruit Tarts With Pastry Cream
These delightful mini fruit tarts are perfect for any occasion, whether it’s a casual family gathering or a fancy dinner party. Here are some creative ways to serve them that will impress your guests.
Individual Serving Suggestions
- On a dessert platter: Arrange the mini fruit tarts on a large dessert platter for an eye-catching centerpiece. This allows guests to easily grab their favorite tart.
- With fresh mint leaves: Garnish each tart with a sprig of fresh mint for added color and a refreshing flavor that complements the fruit.
- Drizzled with chocolate sauce: A light drizzle of chocolate sauce over the tarts can add an elegant touch and enhance the overall dessert experience.
- Accompanied by whipped cream: Serve alongside a dollop of whipped cream for those who enjoy an extra creamy texture with their fruit tarts.
Seasonal Pairings
- In summer with berries: Use seasonal berries like strawberries and blueberries as toppings during summer months for vibrant colors and flavors.
- In autumn with apples: Swap out the fruits for thinly sliced apples and add a sprinkle of cinnamon for a cozy fall-inspired treat.
- In winter with citrus: Top with slices of oranges or mandarins during winter months to add brightness to those chilly days.
How to Perfect Mini Fruit Tarts With Pastry Cream
Creating the perfect mini fruit tarts requires attention to detail and some handy tips. Follow these suggestions to elevate your tarts.
- Use cold ingredients: Keeping your butter and egg cold will help create a flaky pastry shell that is light and buttery.
- Don’t overwork the dough: Mix just until combined; overworking can lead to tough tart shells. Aim for a soft, pliable dough.
- Chill before baking: Letting the tart shells chill in the freezer ensures they hold their shape while baking, preventing shrinkage.
- Fill at the right time: Fill your cooled tart shells with pastry cream just before serving to maintain freshness and prevent sogginess.
- Vary the toppings: Experiment with different fruits like kiwi, raspberries, or peaches for unique flavor combinations each time you make them.
Best Side Dishes for Mini Fruit Tarts With Pastry Cream
To complement your mini fruit tarts, consider serving them with these delightful side dishes that enhance their sweetness without overshadowing them.
- Vanilla Ice Cream: A scoop of smooth vanilla ice cream pairs beautifully, providing a creamy contrast to the fruity tartlets.
- Fruit Salad: A light mix of seasonal fruits offers freshness and keeps the dessert theme consistent while adding variety.
- Chocolate Mousse: Rich chocolate mousse adds depth, making it an indulgent side that balances the sweetness of the tarts.
- Coconut Whipped Cream: This dairy-free alternative is fluffy and adds tropical notes that work well with fruity desserts.
- Panna Cotta: Silky panna cotta can be flavored with vanilla or coconut, offering another layer of creamy bliss alongside your mini tarts.
- Cheese Platter: A selection of mild cheeses can provide a savory contrast, creating an interesting balance on your dessert table.
Common Mistakes to Avoid
When making Mini Fruit Tarts With Pastry Cream, avoiding common mistakes can make a big difference in your results. Here are some pitfalls to watch out for.
- Overmixing the dough – Mixing the tart dough too much can lead to tough shells. Combine until just mixed for a flaky texture.
- Skipping the chilling step – Allowing the dough to chill is crucial. Skipping this step can cause the dough to shrink during baking.
- Not pre-baking properly – Failing to bake the tarts long enough may result in soggy shells. Look for a light golden color as an indicator of doneness.
- Using warm ingredients – Ensure that the butter and eggs are cold when making the dough. Warm ingredients can affect texture and consistency.
- Ignoring filling cooling time – If you add filling while it’s still hot, it can make the crust soggy. Allow pastry cream to cool completely before filling.
Storage & Reheating Instructions
Refrigerator Storage
- Store mini fruit tarts in an airtight container.
- They can be kept in the refrigerator for up to 2 days.
Freezing Mini Fruit Tarts With Pastry Cream
- Wrap each mini tart individually in plastic wrap.
- Freeze them for up to 1 month for optimal freshness.
Reheating Mini Fruit Tarts With Pastry Cream
- Oven – Preheat your oven to 350°F (175°C) and reheat for about 10 minutes for best results.
- Microwave – Heat on medium power in short intervals (15-20 seconds) until warmed through; avoid overheating.
- Stovetop – Use a skillet over low heat, covering with a lid. This method keeps them from drying out.
Frequently Asked Questions
Here are some frequently asked questions about Mini Fruit Tarts With Pastry Cream that might help clarify your doubts.
How do I make Mini Fruit Tarts With Pastry Cream?
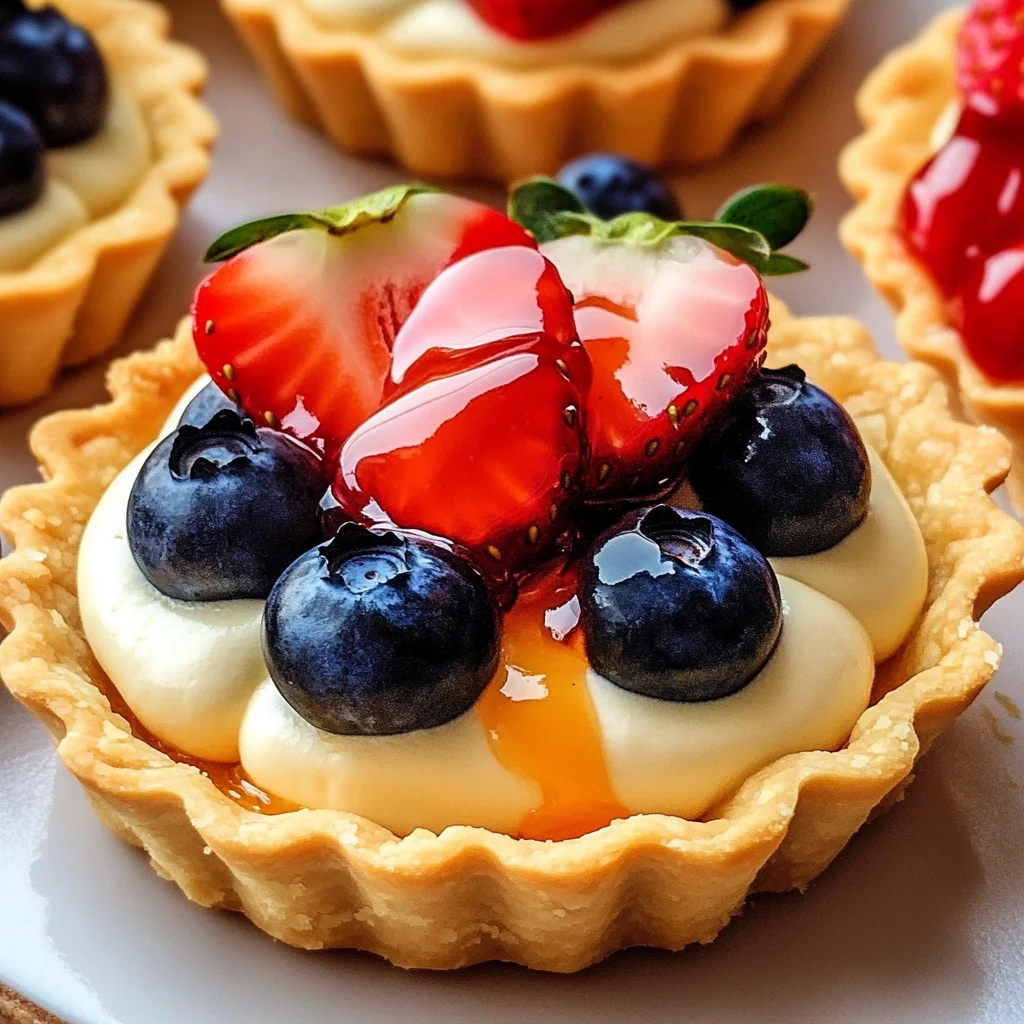
To make Mini Fruit Tarts With Pastry Cream, prepare your tart shells, fill them with homemade pastry cream, and top with fresh fruits like strawberries and blueberries.
Can I customize Mini Fruit Tarts With Pastry Cream?
Absolutely! You can change fruits based on the season or even experiment with different toppings like chocolate shavings or nuts.
What is the best way to store leftover Mini Fruit Tarts With Pastry Cream?
Store leftovers in an airtight container in the refrigerator for up to two days. For longer storage, consider freezing them without toppings.
How long will Mini Fruit Tarts With Pastry Cream last?
These delicious treats will last about two days in the fridge and up to a month if frozen properly.
Can I use other fruits for my Mini Fruit Tarts?
Yes! Feel free to use any seasonal fruits you enjoy, such as kiwi, peaches, or raspberries, for a colorful presentation.
Final Thoughts
Mini Fruit Tarts With Pastry Cream are not only delightful but also versatile, allowing you to customize them with your favorite fruits. Their buttery crust and creamy filling create a perfect balance of flavors that everyone will love. Try this recipe today and enjoy creating your own beautiful dessert!
Mini Fruit Tarts With Pastry Cream

Mini Fruit Tarts With Pastry Cream are a delightful bite-sized dessert that combines a flaky pastry shell with rich, homemade pastry cream and an array of colorful fresh fruits. These tarts are perfect for any occasion, from casual family gatherings to elegant dinner parties. The beauty of this recipe lies not only in its deliciousness but also in its versatility; you can customize the toppings with your favorite seasonal fruits. Easy to prepare and visually stunning, these mini fruit tarts will impress your guests and satisfy your sweet cravings.
- Prep Time: 30 minutes
- Cook Time: 20 minutes
- Total Time: 50 minutes
- Yield: Approximately 12 servings 1x
- Category: Dessert
- Method: Baking
- Cuisine: American
Ingredients
- 1/2 cup Unsalted Butter (cold)
- 1 Egg
- 1/2 tsp Vanilla extract
- 1/2 cup Powdered sugar
- 1/4 tsp Kosher salt
- 2 cups Flour
- 1 3/4 cups Milk
- 2 tsp Vanilla extract
- 5 Egg yolks
- 1/4 tsp Kosher salt
- 1/2 cup Granulated sugar
- 3 tbsp Cornstarch
- Strawberries
- Blueberries
- 1 tbsp Apricot jam
- 1/2 tsp Water
Instructions
- Make the tart dough by blending flour, powdered sugar, and salt. Add cold butter until pea-sized pieces form.
- Mix in the egg and vanilla until a dough forms. Chill the dough for at least an hour.
- Roll out the chilled dough and cut it into rounds to fit mini tart pans. Press into pans and freeze for 20 minutes.
- Preheat the oven to 350°F (180°C) and bake tart shells for 15-20 minutes until golden brown. Let cool.
- Prepare the pastry cream by heating milk and whisking together egg yolks with sugar and cornstarch. Combine when thickened.
- Fill cooled tart shells with pastry cream and top with fresh fruits glazed with apricot jam mixed with water.
Nutrition
- Serving Size: 1 mini tart (50g)
- Calories: 150
- Sugar: 10g
- Sodium: 50mg
- Fat: 7g
- Saturated Fat: 4g
- Unsaturated Fat: 2g
- Trans Fat: 0g
- Carbohydrates: 19g
- Fiber: 1g
- Protein: 3g
- Cholesterol: 80mg