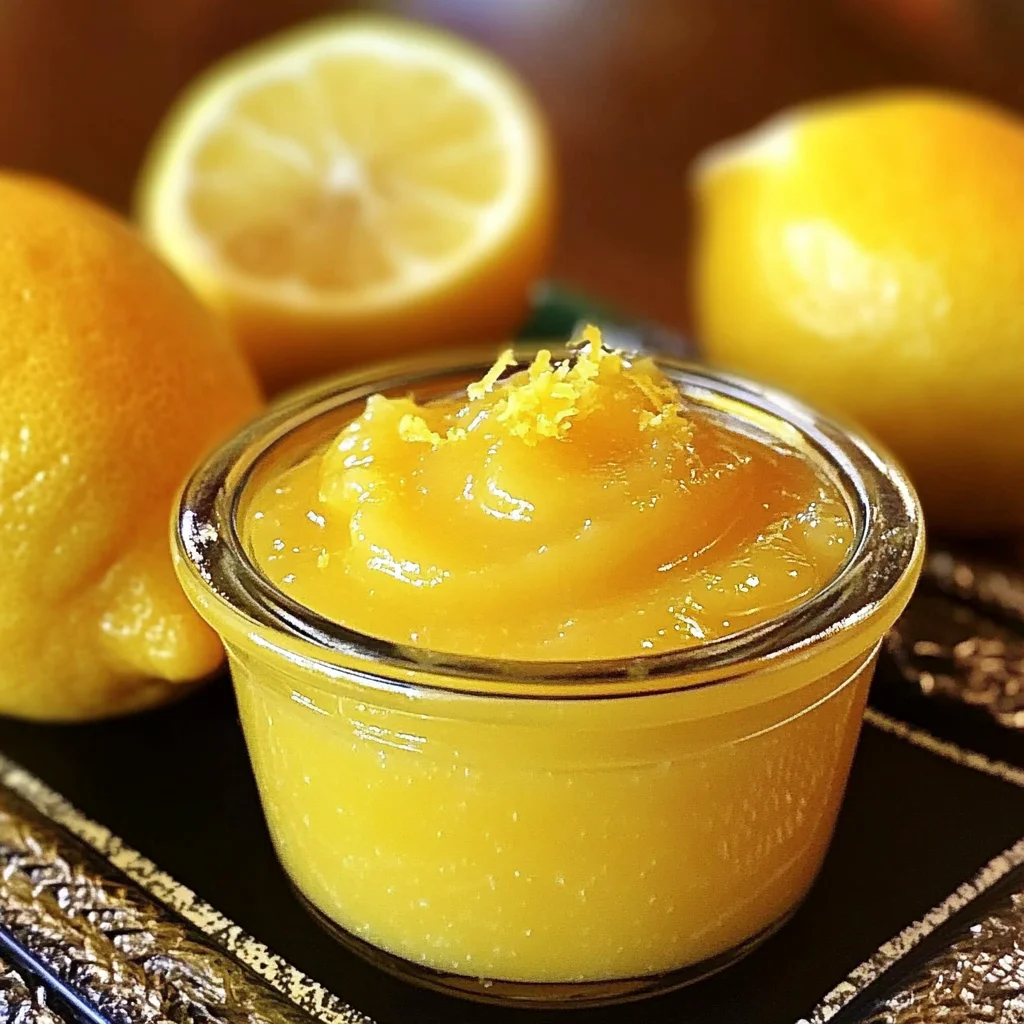
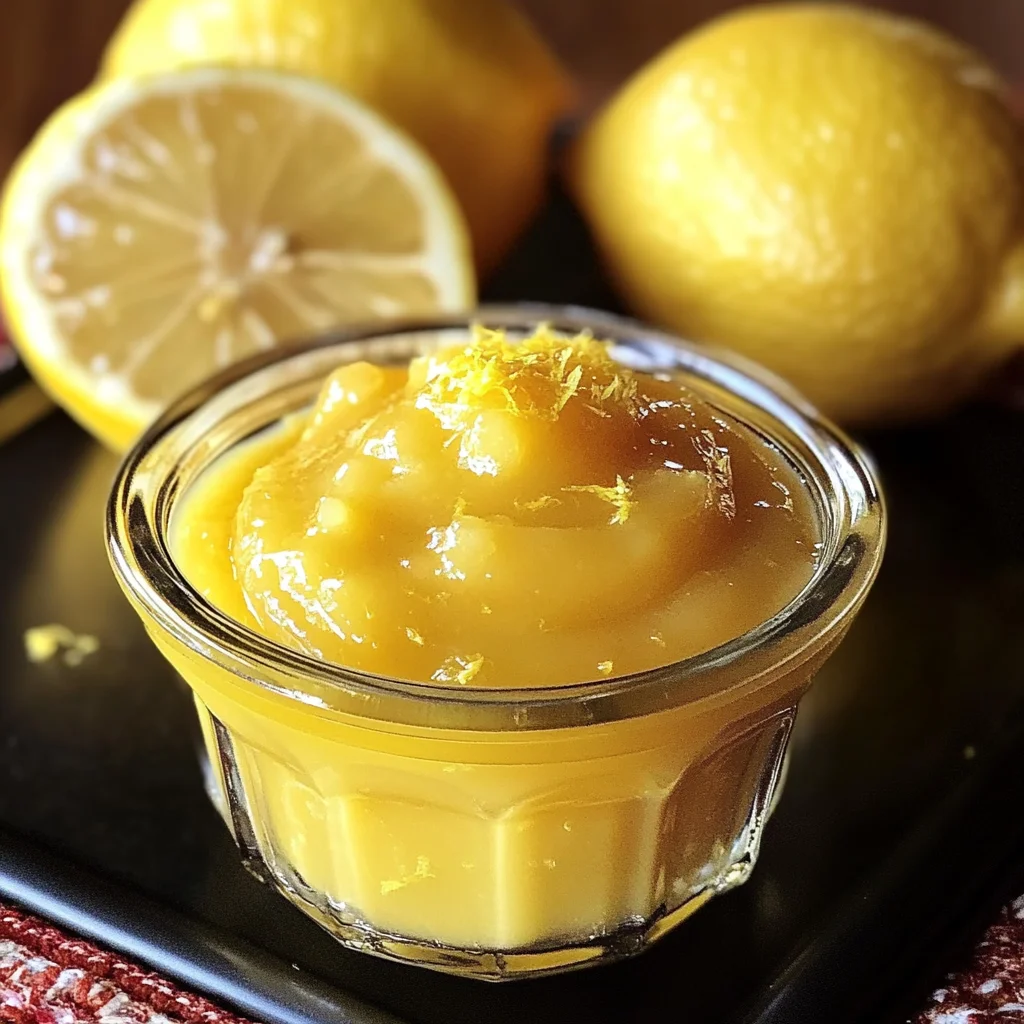
How to Make Lemon Curd
Bright, tart, and tasty … the possibilities with Lemon Curd are seemingly endless. And fortunately for lemon lovers, making homemade Lemon Curd is not hard at all! This delightful treat enhances desserts, can be spread on toast, or used as a filling in pastries. Perfect for any occasion, this recipe stands out due to its fresh flavor and simple preparation.
Why You’ll Love This Recipe
- Quick and Easy: This Lemon Curd comes together in just 18 minutes, making it a fast dessert option.
- Versatile Flavor: The bright lemon taste adds a refreshing twist to cakes, tarts, and more.
- Perfect for Any Occasion: Whether for brunch, tea time, or dessert, this curd fits right in.
- Homemade Goodness: Using fresh ingredients ensures a vibrant flavor that store-bought versions can’t match.
- Customizable: You can adjust the sweetness or mix in other flavors like ginger or berries.
Tools and Preparation
Before you start making your Lemon Curd, gather the essential tools. These will ensure a smooth cooking process and perfect results.
Essential Tools and Equipment
- Medium saucepan
- Whisk
- Measuring cups
- Measuring spoons
- Mixing bowl
Importance of Each Tool
- Medium saucepan: Ideal for heating and thickening the mixture without burning it.
- Whisk: Ensures even mixing and prevents lumps for a smooth texture.
- Measuring cups: Accurate measurements lead to consistent results every time.

Ingredients
For the Base
- 1 c. + 2 T. granulated sugar
- 1 T. cornstarch
- 1/8 tsp. salt
For the Flavor
- 1 c. fresh lemon juice (approximately 5 lemons)
- 3 large eggs
- 2 T. unsalted butter
- 1 tsp. grated lemon rind
How to Make How to Make Lemon Curd
Step 1: Combine Dry Ingredients
In a medium saucepan, combine the granulated sugar, cornstarch, and salt. Use a whisk to stir these dry ingredients together until well mixed.
Step 2: Add Wet Ingredients
Stir in the fresh lemon juice and eggs into the dry mixture. Bring this mixture to a boil over medium heat while stirring constantly with your whisk.
Step 3: Thicken the Mixture
Once boiling, reduce the heat and let it simmer for about 1 minute or until thickened. Keep stirring constantly to prevent sticking or burning.
Step 4: Incorporate Butter and Lemon Rind
Remove from heat and add the unsalted butter along with the grated lemon rind. Stir gently until the butter melts completely into the mixture.
Step 5: Cool and Chill
Spoon your Lemon Curd into a bowl to cool down at room temperature. Once cooled, cover it and chill in the refrigerator for at least 6 hours or overnight for best results. The curd will thicken further as it chills.
With these simple steps on how to make Lemon Curd, you’ll have a delicious topping or filling that elevates any dessert!
How to Serve How to Make Lemon Curd
Lemon curd is a versatile treat that can enhance a variety of dishes and desserts. Its bright flavor pairs well with many options, making it perfect for any occasion.
Spread on Toast
- Toasted bread or scones topped with lemon curd makes for a delightful breakfast or afternoon tea snack.
Fill Pastries
- Use lemon curd as a filling for tarts, pies, or puff pastries for a fresh and zesty dessert.
Top Yogurt
- Drizzle lemon curd over plain yogurt to add sweetness and tang, creating a refreshing breakfast or snack.
Mix into Cakes
- Incorporate lemon curd into cake layers or use it as a glaze on cupcakes for added moisture and flavor.
Pair with Ice Cream
- Serve lemon curd alongside vanilla ice cream for an easy yet elegant dessert option.
Use in Cheesecakes
- Swirl lemon curd into cheesecake batter for a bright twist on this classic dessert.
How to Perfect How to Make Lemon Curd
Making the perfect lemon curd requires attention to detail. Follow these tips to ensure your curd turns out smooth and flavorful.
- Use fresh lemons: Freshly squeezed lemon juice will provide the best taste compared to bottled alternatives.
- Whisk constantly: Stirring continuously prevents the eggs from scrambling and ensures a smooth texture.
- Monitor heat: Cooking on medium heat helps achieve the right thickness without burning the mixture.
- Cool completely: Allowing the curd to cool completely before chilling helps it thicken properly.
- Store properly: Keep your lemon curd in an airtight container in the refrigerator to maintain freshness.
- Experiment with flavors: For variety, consider adding other citrus juices or zest to create unique flavor profiles.
Best Side Dishes for How to Make Lemon Curd
Pairing side dishes with lemon curd can elevate your meal experience. Here are some delicious options that complement its tartness.
- Shortbread Cookies: Buttery shortbread cookies are perfect for dipping into lemon curd.
- Pavlova: This light meringue dessert topped with whipped cream and fruit goes wonderfully with tangy lemon curd.
- Fruit Salad: A fresh fruit salad served with a dollop of lemon curd adds brightness and flavor.
- Crepes: Thin crepes filled with lemon curd offer an elegant brunch option that’s simple yet impressive.
- Cheese Platter: Pairing cheese, especially creamy varieties, with lemon curd creates a delightful contrast of flavors.
- Pancakes: Stack pancakes high and add a layer of lemon curd between them for a zesty breakfast treat.
- Muffins: Lemon muffins served warm can be enhanced by spreading some homemade lemon curd on top.
Common Mistakes to Avoid
Making lemon curd can be delightful, but there are common pitfalls to watch for.
- Bold sugar measurement: Using too much or too little sugar can affect the sweetness and texture. Always measure carefully to achieve the right balance.
- Bold not whisking enough: Failing to whisk continuously while cooking can lead to scrambled eggs in your lemon curd. Keep that whisk moving for a smooth finish.
- Bold skipping the cooling step: Letting lemon curd cool is crucial for thickening. Don’t rush this; refrigerate it as instructed for optimal results.
- Bold using bottled lemon juice: Fresh lemon juice makes a significant difference in flavor. Always opt for fresh lemons when making lemon curd.
- Bold ignoring storage tips: Improper storage can spoil your lemon curd quickly. Use airtight containers and follow proper cooling guidelines.
Storage & Reheating Instructions
Refrigerator Storage
- Store homemade lemon curd in an airtight container.
- It will keep well in the refrigerator for up to 1 week.
Freezing How to Make Lemon Curd
- You can freeze lemon curd for longer storage.
- Use a freezer-safe container or freezer bags, leaving some space for expansion.
- It can be frozen for up to 3 months.
Reheating How to Make Lemon Curd
- Bold oven method: Preheat to 350°F (175°C) and warm in a heatproof dish, stirring occasionally until just warmed through.
- Bold microwave method: Heat in short intervals (10-15 seconds), stirring between each, until just warm.
- Bold stovetop method: Place over low heat in a saucepan, stirring gently until warmed but not boiling.
Frequently Asked Questions
Here are some common questions about how to make lemon curd.
What is the best way to make lemon curd?
To make the best lemon curd, use fresh ingredients and follow the cooking instructions closely. Constantly whisking is key for success.
Can I adjust the sweetness of my lemon curd?
Yes! You can reduce or increase the sugar according to your taste preferences. Just remember that this will also impact its texture.
How to Make Lemon Curd safe for longer storage?
Ensure your container is airtight and store it promptly in the refrigerator after cooling. This keeps it fresh and safe from bacteria.
Can I use other citrus fruits instead of lemons?
Absolutely! You can experiment with limes, oranges, or even grapefruit for unique flavors while following the same recipe.
Final Thoughts
Homemade lemon curd is bright, tangy, and versatile, perfect for spreading on toast, using in desserts, or even as a filling. This recipe allows you the freedom to customize flavors by adding herbs or other citrus fruits. Give it a try and enjoy its delightful taste!
Lemon Curd

Discover the joy of making homemade lemon curd, a bright and tangy spread that elevates any dessert or breakfast treat. This quick and easy recipe takes just 18 minutes to prepare, allowing you to whip up a fresh batch that outshines store-bought versions. Perfect for toast, pastries, or even as a drizzle over yogurt, this versatile lemon curd is sure to be a favorite in your kitchen. With the option to customize flavors by adding ginger or berries, you can make it uniquely yours. Get ready to enjoy the refreshing burst of citrus with every bite!
- Prep Time: 10 minutes
- Cook Time: 8 minutes
- Total Time: 18 minutes
- Yield: Approximately 12 servings (240 grams total) 1x
- Category: Dessert
- Method: Stovetop
- Cuisine: American
Ingredients
- 1 cup + 2 tablespoons granulated sugar
- 1 tablespoon cornstarch
- 1/8 teaspoon salt
- 1 cup fresh lemon juice (approximately 5 lemons)
- 3 large eggs
- 2 tablespoons unsalted butter
- 1 teaspoon grated lemon rind
Instructions
- In a medium saucepan, whisk together the sugar, cornstarch, and salt until well combined.
- Add the fresh lemon juice and eggs to the dry mixture, stirring continuously while bringing it to a boil over medium heat.
- Once boiling, reduce heat and let it simmer for about one minute until thickened, stirring constantly.
- Remove from heat and stir in the unsalted butter and grated lemon rind until fully melted.
- Allow the curd to cool at room temperature before transferring it to an airtight container. Chill in the refrigerator for at least 6 hours.
Nutrition
- Serving Size: 30g
- Calories: 92
- Sugar: 13g
- Sodium: 11mg
- Fat: 3g
- Saturated Fat: 2g
- Unsaturated Fat: 1g
- Trans Fat: 0g
- Carbohydrates: 14g
- Fiber: 0g
- Protein: 1g
- Cholesterol: 55mg