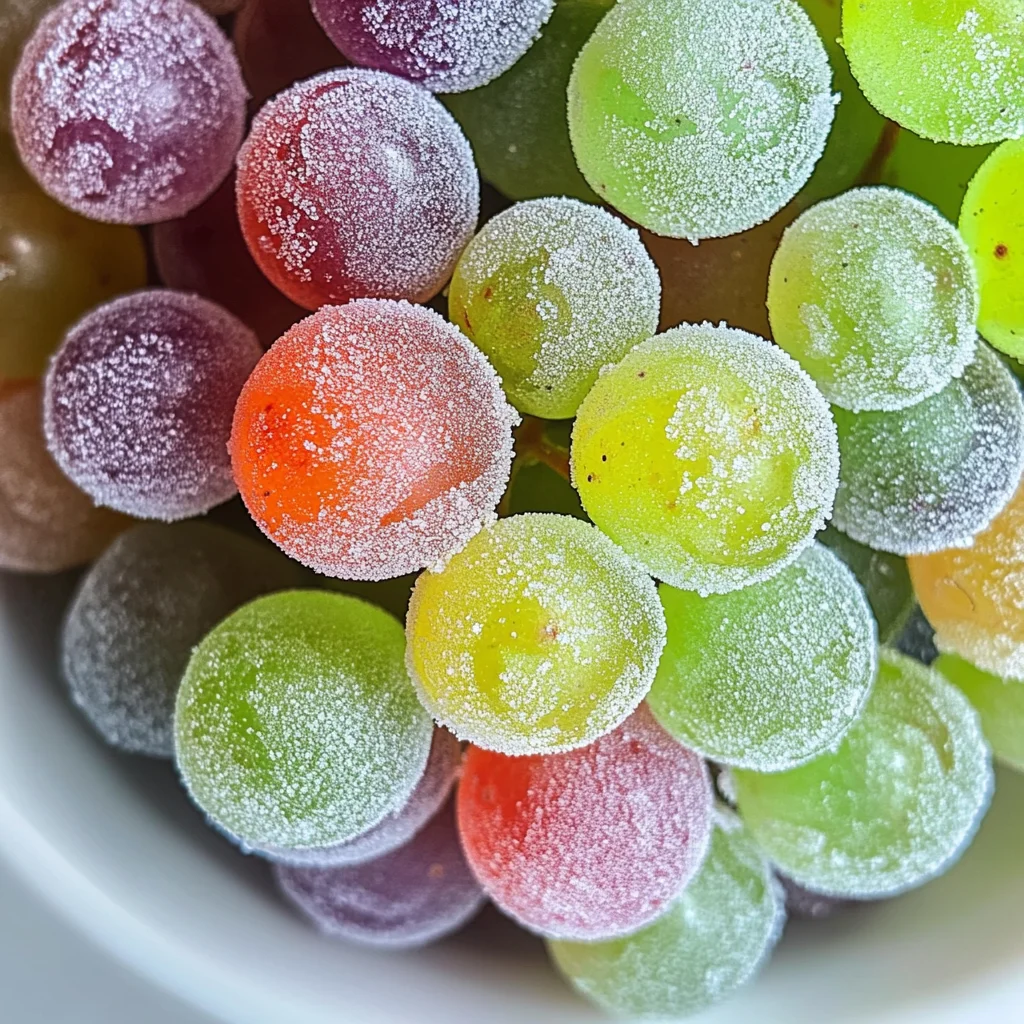
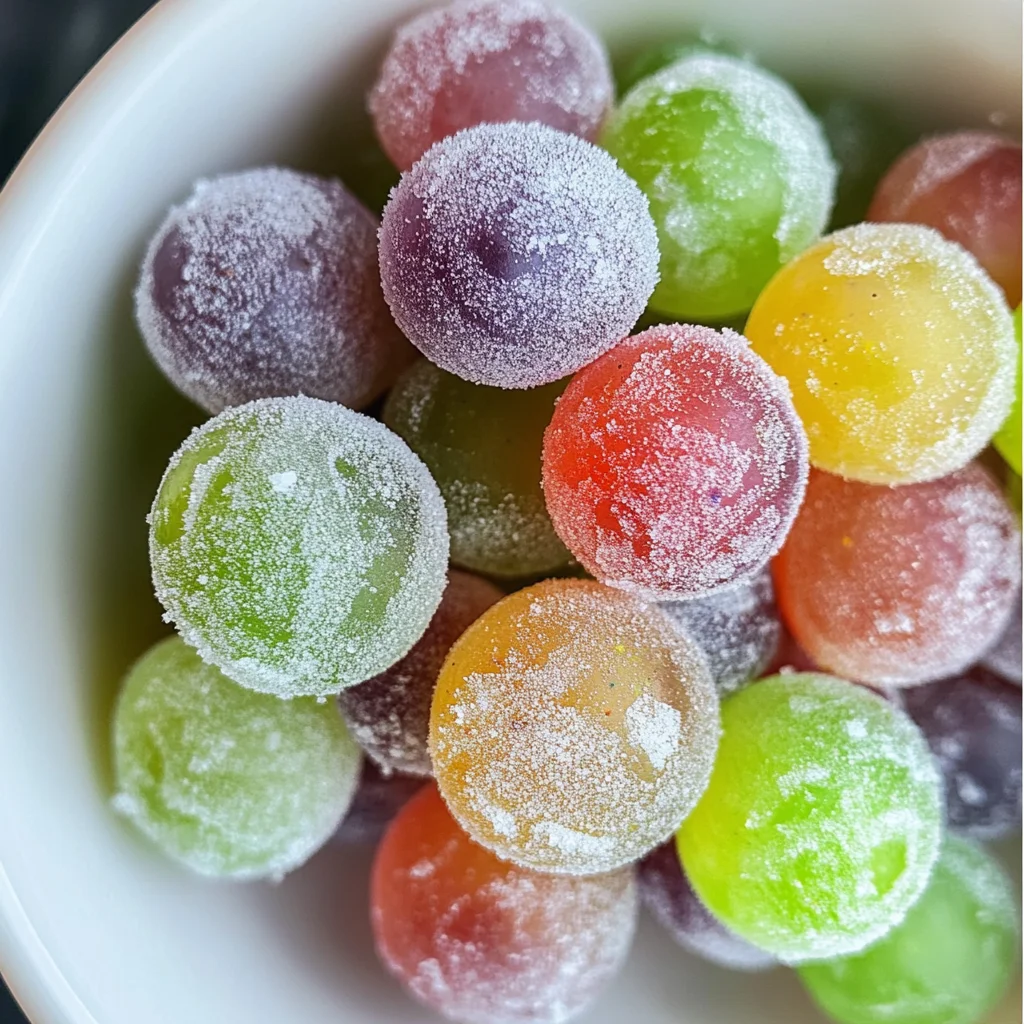
Kool Aid Grapes
Experience a burst of flavor with Kool-Aid Grapes! These vibrant, candy-like treats combine juicy grapes with the tangy sweetness of Kool-Aid. Perfect for snacking, parties, or a fun twist on fruit, they’re a delightful and colorful treat that appeals to both kids and adults alike.
Why You’ll Love This Recipe
- Easy to Make: With just two main ingredients, these Kool-Aid Grapes are quick to whip up, making them an ideal snack option.
- Bursting with Flavor: The combination of sweet grapes and tangy Kool-Aid creates a unique taste that is sure to please your palate.
- Fun for All Ages: Kids will love the colorful appearance and sweet taste, while adults appreciate the nostalgia of this classic treat.
- Perfect for Any Occasion: Whether you’re hosting a party, packing snacks for a picnic, or simply looking for a fun dessert, Kool-Aid Grapes fit the bill.
- Customizable Flavors: Choose your favorite Kool-Aid flavors to create a variety of tasty options that everyone can enjoy.
Tools and Preparation
Before you get started, gather your tools and prepare your workspace. Having everything ready will make the process smooth and enjoyable.
Essential Tools and Equipment
- Colander
- Ziplock bags
- Baking sheet
- Parchment paper
Importance of Each Tool
- Colander: This tool is essential for rinsing grapes thoroughly, ensuring they are clean before coating them in Kool-Aid.
- Ziplock bags: Using these bags allows you to mix the Kool-Aid evenly with the grapes without making a mess.
- Baking sheet: A flat surface for freezing the coated grapes ensures they freeze evenly and maintains their shape.

Ingredients
To make these delightful Kool-Aid Grapes, you’ll need:
For the Snack
- 6 oz Kool-Aid mix
- 3 lbs Green grapes
How to Make Kool Aid Grapes
Step 1: Freeze the Grapes
Start by freezing your grapes for one hour. This helps in creating that refreshing icy texture.
Step 2: Remove Stems
After an hour, twist off the stems from the frozen grapes. They should come off easily while still frozen.
Step 3: Rinse the Grapes
Place the grapes in a colander and rinse them under cool water. This step ensures any residues are washed away before adding flavor.
Step 4: Prepare Flavor Bags
Divide the rinsed grapes into separate ziplock bags based on your choice of Kool-Aid flavors.
Step 5: Add Kool-Aid
Add Kool-Aid mix to each bag. Seal them tightly and shake gently until all grapes are evenly coated with flavor.
Step 6: Spread on Baking Sheet
Line a baking sheet with parchment paper. Spread out the coated grapes on it so they don’t stick together while freezing.
Step 7: Final Freeze
Freeze the baking sheet with grapes for 24 hours. Once frozen solid, they’re ready to enjoy as a refreshing snack!
Enjoy your colorful and flavorful Kool-Aid Grapes!
How to Serve Kool Aid Grapes
Kool-Aid Grapes are a fun and vibrant snack that can be served in various ways. They are perfect for parties, picnics, or just as a colorful addition to your fruit platter. Here are some creative serving suggestions to elevate your Kool-Aid Grapes experience.
Fun Fruit Skewers
- Create skewers by alternating Kool-Aid Grapes with other fruits like strawberries and pineapple for an eye-catching display.
Party Snack Bowls
- Serve Kool-Aid Grapes in individual bowls at parties for easy snacking. Consider adding some mint leaves for a refreshing touch.
Ice Cream Topping
- Use Kool-Aid Grapes as a unique topping for vanilla or strawberry ice cream. The burst of flavor will create a delightful contrast with the creamy texture.
Kids’ Snack Packs
- Pack Kool-Aid Grapes in lunch boxes alongside cheese sticks or whole grain crackers for a balanced snack that kids will love.
Colorful Fruit Salad
- Mix Kool-Aid Grapes into a fruit salad with other colorful fruits like kiwi and mango for added sweetness and visual appeal.
How to Perfect Kool Aid Grapes
To make the best Kool-Aid Grapes, follow these simple tips to ensure maximum flavor and enjoyment.
- Choose ripe grapes: Select fresh, firm grapes for the best texture and taste. Ripe grapes hold onto the Kool-Aid flavor better.
- Experiment with flavors: Try different Kool-Aid flavors to find your favorite combinations. Each flavor adds its own unique twist to the grapes.
- Adjust freezing time: If you prefer firmer grapes, freeze them longer than 24 hours. For softer bites, reduce the freezing time slightly.
- Add a sprinkle of salt: A tiny pinch of salt can enhance the sweetness of the grapes and balance out the flavors beautifully.
- Seal bags tightly: Ensure ziplock bags are sealed well before coating with Kool-Aid to prevent spills and achieve even coverage.
Best Side Dishes for Kool Aid Grapes
Kool-Aid Grapes pair well with various side dishes that complement their sweet and tangy flavors. Here are some great options to consider:
- Cheese Platter: A mix of sharp cheddar, creamy brie, and tangy goat cheese pairs nicely with the sweetness of the grapes.
- Vegetable Sticks: Crunchy carrots, cucumbers, and bell peppers provide a fresh contrast to the sugary treat.
- Mini Sandwiches: Cut sandwiches into fun shapes using cookie cutters; fillings like turkey or hummus work well.
- Guacamole and Chips: The creamy texture of guacamole balances out the fruity sweetness of the Kool-Aid Grapes.
- Pita Bread with Hummus: Soft pita bread dipped in hummus offers a satisfying savory option alongside sweet snacks.
- Trail Mix: A blend of nuts, seeds, and dried fruits creates a healthy alternative that complements the grapes’ sweet flavor.
- Popcorn: Lightly salted popcorn brings a crunchy element that pairs surprisingly well with sweet treats.
- Caprese Salad Bites: Cherry tomatoes, mozzarella balls, and basil drizzled with balsamic glaze provide a refreshing side that contrasts with the candy-like grapes.
Common Mistakes to Avoid
Avoiding common pitfalls can make your Kool Aid Grapes even more delicious. Here are some mistakes to watch out for:
- Not freezing grapes long enough: Make sure to freeze the grapes for at least an hour to ensure they are firm and can hold the Kool-Aid coating well.
- Using too much Kool-Aid mix: Adding excessive Kool-Aid can overpower the grapes. Stick to the recommended amount for balanced flavor.
- Skipping rinsing the grapes: Rinsing removes any dirt or wax, ensuring a clean taste. Always rinse before coating.
- Not sealing bags tightly: If the ziplock bags aren’t sealed well, the Kool-Aid won’t coat the grapes properly. Ensure they are tightly closed before shaking.
- Ignoring freezing time after coating: Allowing the coated grapes to freeze for a full 24 hours is crucial for achieving that perfect frozen treat consistency.
Storage & Reheating Instructions
Refrigerator Storage
- Store in an airtight container to maintain freshness.
- Keep in the fridge for up to 3 days, but they are best enjoyed fresh.
Freezing Kool Aid Grapes
- Freeze in ziplock bags or airtight containers.
- They can last up to 2 months in the freezer without losing flavor.
Reheating Kool Aid Grapes
- Oven: Not recommended as these treats are best enjoyed frozen.
- Microwave: Avoid using; they lose their texture when thawed quickly.
- Stovetop: Not applicable; enjoy them straight from the freezer.
Frequently Asked Questions
Here are some common questions about making Kool Aid Grapes:
What are Kool Aid Grapes?
Kool Aid Grapes are frozen treats made by coating grapes with flavored Kool-Aid powder, resulting in a sweet, tangy snack.
How long do Kool Aid Grapes last?
Kool Aid Grapes can be stored in the refrigerator for about 3 days and up to 2 months in the freezer.
Can I use different flavors of Kool Aid?
Absolutely! Feel free to experiment with various flavors of Kool Aid to create a variety of tasty grape snacks.
Are Kool Aid Grapes healthy?
While they offer a fun twist on fruit, moderation is key due to added sugars from the Kool-Aid. Enjoy them as an occasional treat!
How do I make Kool Aid Grapes without gelatin?
This recipe doesn’t require gelatin at all, making it easy and suitable for everyone. Just use fresh grapes and follow the instructions!
Final Thoughts
Kool Aid Grapes are a fun and vibrant treat that kids and adults alike will love. With easy preparation and endless flavor possibilities, they’re perfect for summer snacks or party treats. Don’t hesitate to customize with your favorite flavors or mix them up for a colorful presentation!
Kool-Aid Grapes

Kool-Aid Grapes are a delightful frozen treat that transforms ordinary grapes into a burst of sweet and tangy flavor, making them perfect for snacks, parties, or a fun dessert. With their vibrant colors and playful taste, these Kool-Aid coated grapes will appeal to both kids and adults. Easy to prepare with just two ingredients, they provide an exciting twist on traditional fruit snacks. Whether you choose to make them for a summer gathering or as a cool treat after school, Kool-Aid Grapes are sure to impress.
- Prep Time: 15 minutes
- Cook Time: 24 hours
- Total Time: 24 hours 15 minutes
- Yield: Approximately 6 servings 1x
- Category: Snack
- Method: Freezing
- Cuisine: American
Ingredients
- 6 oz Kool-Aid mix (any flavor)
- 3 lbs green grapes
Instructions
- Freeze the grapes for 1 hour to achieve an icy texture.
- Remove stems from the frozen grapes.
- Rinse the grapes under cool water in a colander.
- Divide the rinsed grapes into ziplock bags based on your preferred Kool-Aid flavors.
- Add Kool-Aid mix to each bag, seal tightly, and shake until evenly coated.
- Spread the coated grapes on a baking sheet lined with parchment paper.
- Freeze for 24 hours before enjoying.
Nutrition
- Serving Size: 1 cup (150g)
- Calories: 130
- Sugar: 30g
- Sodium: 10mg
- Fat: 0g
- Saturated Fat: 0g
- Unsaturated Fat: 0g
- Trans Fat: 0g
- Carbohydrates: 33g
- Fiber: 1g
- Protein: 1g
- Cholesterol: 0mg