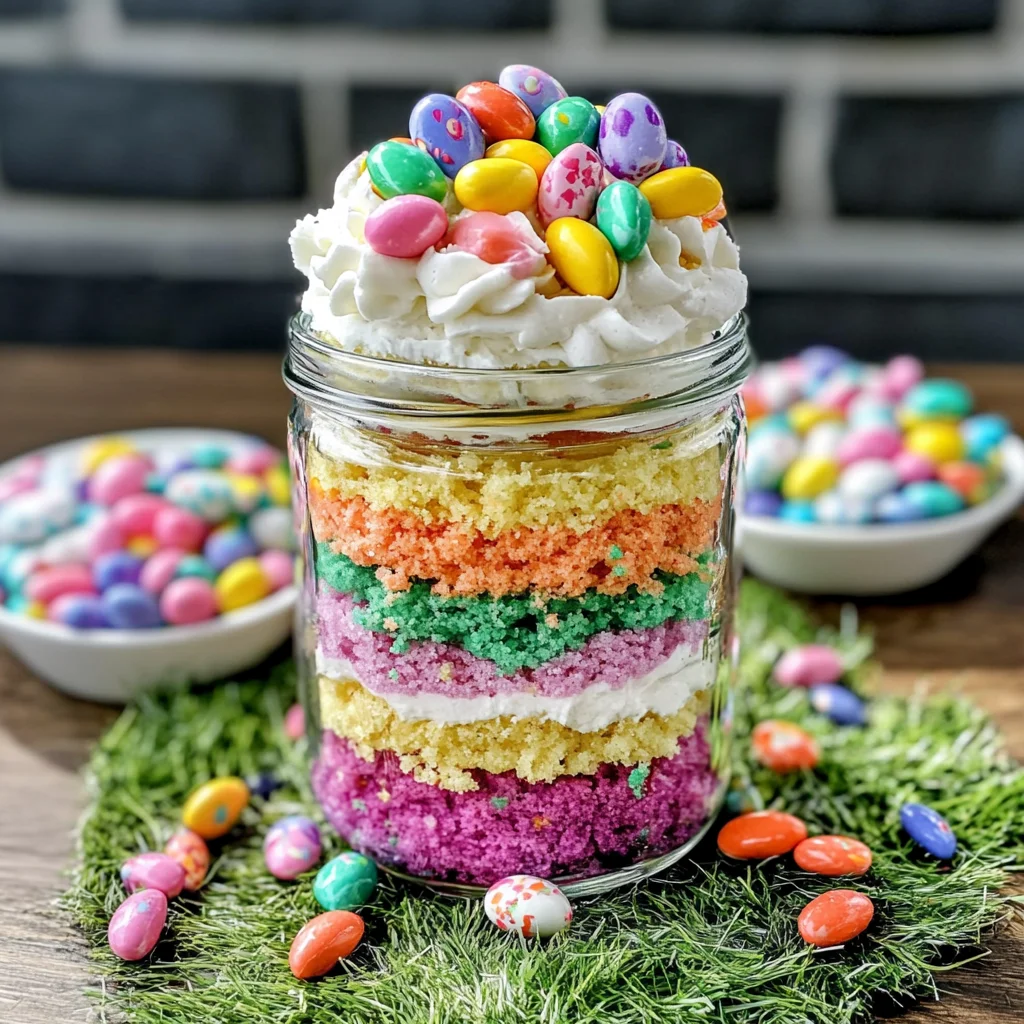
Easter Cake in a Jar
Easter Cake in a Jar is a delightful dessert that brings a fresh twist to traditional cupcakes. This fun and colorful treat is perfect for Easter celebrations, birthday parties, or any festive gathering. Not only does it look charming in jars, but it also offers layers of flavor and texture that guests will love. The make-ahead aspect makes it easy for hosts to enjoy the festivities without stress.
Why You’ll Love This Recipe
- Eye-Catching Presentation: The layered colors and decorations make each jar a visual delight.
- Make-Ahead Convenience: Prepare these delightful cakes in advance and save time on the day of your event.
- Customizable Flavors: You can easily switch up the colors and decorations to match any occasion.
- Fun for Kids: Involve children in the decorating process, making it an enjoyable activity for the whole family.
- Perfect Portion Control: Each jar serves one, making it easy to manage servings at gatherings.
Tools and Preparation
To create your Easter Cake in a Jar, you’ll need some essential tools. These items will help streamline your baking process and ensure everything turns out perfectly.
Essential Tools and Equipment
- Jar (4-6 oz.)
- Mixing bowls
- Cupcake tins
- Plastic piping bag (or a ziplock bag)
- Oven
Importance of Each Tool
- Jar: The jar not only serves as a container but also showcases the beautiful layers of cake and frosting.
- Mixing Bowls: Having multiple bowls allows you to easily prepare different colored batters without mixing them together.
- Cupcake Tins: These are essential for baking uniform cupcakes that are easy to crumble into layers.
- Plastic Piping Bag: Using this tool helps create neat frosting layers between cake colors.


Ingredients
To make these delightful Easter Cakes in Jars, gather the following ingredients:
For the Cake
- 1 White Cake Mix, make batter per package directions
- Food Coloring—pink, yellow, teal, purple
For the Frosting and Decoration
- 1 Can White Frosting
- Edible Easter Grass
- Jelly Bean Easter Eggs
- Optional: Easter Sprinkles
Additional Supplies
- 4 Jars—4-6 oz.
How to Make Easter Cake in a Jar
Step 1: Prepare the Batter
- Divide the cake batter into 4 small bowls.
- Color each bowl with different food coloring: pink, yellow, teal, and purple.
Step 2: Bake the Cupcakes
- Scoop the colored batter into cupcake tins.
- Bake according to package directions until golden brown.
Step 3: Crumble the Cupcakes
- Once cooled, crumble each color of cupcake into separate bowls to maintain color separation.
Step 4: Prepare the Frosting
- Place white frosting into a plastic bag and cut off one corner to use as a piping bag.
Step 5: Layer Your Jars
- Begin by adding a scoop of purple cake into a jar.
- Pipe a thin layer of frosting over the cake layer.
- Continue layering with different colors of cake and frosting until jars are filled, finishing with frosting on top.
Step 6: Decorate Your Jars
- Top each jar with edible grass and jellybean eggs to resemble little nests.
- Optionally, you can sprinkle Easter-themed sprinkles on top for extra flair.
Enjoy this fun dessert that brings joy and color to any Easter celebration!
How to Serve Easter Cake in a Jar
Easter Cake in a Jar is not only visually appealing but also versatile in its serving options. Here are some fun ways to present this delightful dessert that will impress your guests.
Individual Treats
- Serve each jar as an individual dessert, allowing guests to enjoy their own colorful treat without the need for slicing a cake.
Dessert Table Display
- Arrange multiple jars on a dessert table. Mix and match different colors of frosting and decorations for a vibrant visual feast.
Party Favors
- Package the jars with decorative ribbons and tags. These make for charming party favors that guests can take home.
Kids’ Snack Time
- Place jars at children’s tables during Easter gatherings. They are easy for little hands to hold and enjoy, making them perfect kids’ snacks.
How to Perfect Easter Cake in a Jar
Creating the perfect Easter Cake in a Jar requires attention to detail and some helpful tips. Follow these suggestions to elevate your dessert game.
-
Choose vibrant colors: Use bright food coloring for your cake layers. This makes the layers pop when viewed through the jar.
-
Pipe frosting neatly: Use a piping bag for frosting layers. This technique helps create beautiful, clean lines between the cake layers.
-
Let cupcakes cool completely: Ensure cupcakes are fully cooled before crumbling. This prevents excess moisture from affecting the texture of the cake in the jar.
-
Layer evenly: When adding cake and frosting layers, do so evenly. This ensures each jar has balanced flavors and looks appealing from all angles.
Best Side Dishes for Easter Cake in a Jar
When serving Easter Cake in a Jar, complement it with delicious side dishes that enhance your festive spread. Here are some great options to consider:
-
Fresh Fruit Salad
A colorful mix of seasonal fruits adds freshness and balances the sweetness of the cake jars. -
Veggie Platter with Dip
Crisp vegetables paired with hummus or ranch dip provide a crunchy contrast to soft desserts. -
Cheese Board
An assortment of cheeses, nuts, and crackers creates a savory option that pairs well with sweet treats. -
Mini Sandwiches
Small sandwiches filled with turkey or chicken make for a hearty addition that complements lighter desserts. -
Deviled Eggs
Classic deviled eggs offer protein and richness, making them an excellent addition to any Easter menu. -
Spring Salad
A light salad with mixed greens, citrus fruits, and vinaigrette dressing provides a refreshing touch alongside sweet cakes.
Common Mistakes to Avoid
When making your Easter Cake in a Jar, it’s easy to overlook some details. Here are common mistakes and how to avoid them.
-
Not cooling the cupcakes properly: It’s important to let the cupcakes cool completely before crumbling them. Warm cupcakes can melt the frosting and make layering difficult.
-
Using too much frosting: While frosting adds flavor, overdoing it can overwhelm the cake layers. Use a light hand when piping between the layers to maintain balance.
-
Skipping the food coloring step: The vibrant colors are what make this dessert fun and festive! Make sure to color each bowl of batter well for that eye-catching effect.
-
Ignoring jar cleanliness: Dirty jars can ruin the presentation. Ensure each jar is clean and dry before assembling your dessert.
-
Not layering evenly: To showcase the beautiful layers of cake and frosting, ensure that each layer is even and fills the jar properly. This keeps the visual appeal intact.
-
Overfilling jars: Leave some space at the top for decoration. Overfilling can lead to messy desserts and less room for festive toppings.
Storage & Reheating Instructions
Refrigerator Storage
- Store in airtight containers.
- Keep in the refrigerator for up to 3 days.
Freezing Easter Cake in a Jar
- Freeze without toppings for best results.
- Jars can be frozen for up to one month.
Reheating Easter Cake in a Jar
- Oven: Preheat to 350°F (175°C) and warm jars for about 10 minutes.
- Microwave: Heat individual jars on medium power for 20-30 seconds.
- Stovetop: Place jars in a steaming pot; heat gently for about 5 minutes until warm.
Frequently Asked Questions
Here are some common questions about making an Easter Cake in a Jar.
How do I customize my Easter Cake in a Jar?
You can customize flavors by using different cake mixes or adding extracts like vanilla or almond. Toppings can also vary with fruit, nuts, or chocolate chips.
Can I make this dessert ahead of time?
Yes! You can prepare your Easter Cake in a Jar one day before serving. Just store them properly in the fridge or freezer depending on when you plan to serve them.
Is it possible to use other cake flavors?
Absolutely! Feel free to experiment with different cake mixes such as chocolate, lemon, or carrot cake for unique flavors in your jars.
What are some alternative toppings?
Instead of jellybeans, try using mini chocolate eggs, fresh berries, or edible flowers for a seasonal touch.
How long do these desserts last?
When stored correctly, your Easter Cake in a Jar will last up to three days in the refrigerator or one month if frozen without toppings.
Can kids help with this recipe?
Yes! This is a great recipe for kids to get involved with. They can help color the batter and layer the ingredients into jars for a fun family activity.
Final Thoughts
Easter Cake in a Jar is not only visually appealing but also versatile. You can easily customize flavors and decorations based on personal preference or seasonal themes. This delightful dessert is perfect for any spring celebration—so grab your ingredients and try making this festive treat today!
Easter Cake in a Jar
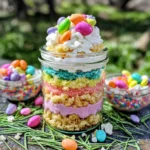
Easter Cake in a Jar is a delightful and vibrant dessert that adds a festive touch to any spring celebration. These charming individual cakes are layered with colorful cake and creamy frosting, all presented beautifully in jars. They are not only visually appealing but also easy to prepare ahead of time, allowing you to enjoy the festivities without stress. Perfect for Easter gatherings, birthday parties, or as playful party favors, this jar cake recipe invites creativity and fun. Involve the kids in decorating these sweet treats, making them an enjoyable activity for the whole family. With endless possibilities for color combinations and toppings, your Easter Cake in a Jar will be the highlight of any dessert table.
- Prep Time: 20 minutes
- Cook Time: 15 minutes
- Total Time: 35 minutes
- Yield: Makes approximately 4 servings (4 jars) 1x
- Category: Dessert
- Method: Baking
- Cuisine: American
Ingredients
- 1 White Cake Mix
- Food Coloring (pink, yellow, teal, purple)
- 1 Can White Frosting
- Edible Easter Grass
- Jelly Bean Easter Eggs
- Optional: Easter Sprinkles
Instructions
- Prepare the cake batter according to package directions and divide it into four bowls.
- Color each bowl with food coloring: pink, yellow, teal, and purple.
- Scoop the colored batter into cupcake tins and bake as directed until golden.
- Once cooled, crumble each cupcake color into separate bowls.
- Place white frosting in a plastic piping bag for easy layering.
- Layer the crumbled cake and frosting in jars starting with purple cake, followed by frosting; repeat layers until jars are full.
- Decorate the top with edible grass and jelly bean eggs.
Nutrition
- Serving Size: 1 jar (180g)
- Calories: 290
- Sugar: 25g
- Sodium: 150mg
- Fat: 10g
- Saturated Fat: 3g
- Unsaturated Fat: 7g
- Trans Fat: 0g
- Carbohydrates: 45g
- Fiber: 1g
- Protein: 2g
- Cholesterol: 0mg